6 common gardening mistakes to avoid
Home and Garden

6 common gardening mistakes to avoid

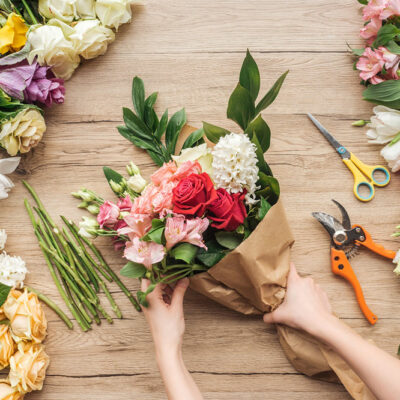
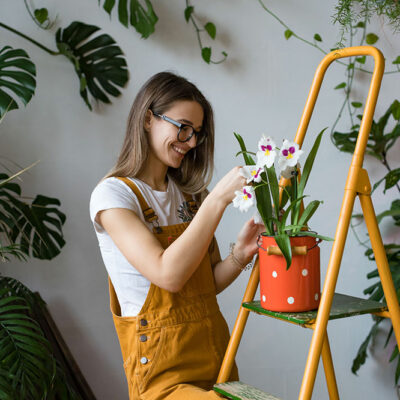
Maintaining a home garden, whether small or large, is a hands-on task. And if you don’t plan on hiring someone to take care of the nitty gritty, you’ve got your hands full with all the tasks that come with gardening. So, from finding the best plants to maintaining them, you have to pay attention to all the details. So, if you plan to make your garden flourish single-handedly, avoid making these common gardening mistakes. Don’t make an overly ambitious garden plan It’s good that you want to take up gardening as more than a weekend hobby. But a common mistake most people make is setting unrealistic goals about how the garden should look. Bigger is not always better when it comes to building a garden, as you will need more time to keep it in great shape. Start small and expand the selection of plants wisely. Don’t overcrowd plants Plants need space to grow and bloom. So, ensure you don’t place them in close proximity. Experts suggest keeping at least two feet of space between saplings so they can grow and spread out naturally. You also don’t want to plant too many varieties, as each type of plant will require specific watering, nutrition, and care.
Unique tools that make home cleaning easy
Home and Garden

Unique tools that make home cleaning easy

Home cleaning can be a long and exhausting process, especially if it is a deep cleaning day. Luckily, apart from the regular brush and broom, several equipment and products are available these days which help keep your home tidy and well-maintained. These small, clever cleaning options available in the market make the whole process such a convenient chore that you can even involve your kids to help you around the house. Cleaning tools and products for your next home deep clean Quick and Clean 6-Pack Cleaning Cups If you are a coffee drinker, then you know how precious your home coffee maker is! A tool that helps improve your morning needs some monthly deep cleaning. Yes, you clean it with your regular cleaning products and can also use DIYs like vinegar to keep the machine tidy, but these Quick and Clean cups are extremely convenient. Just pop them in the brewer, run it for one cycle, and then run another cycle with just water to remove all the buildup from the product. These are available at any regular grocery store. Rubbermaid Reveal Cordless Power Scrubber This is a neat hack to get the grime out of the spaces in between your bathroom tiles and on them.
5 kitchen cleaning hacks that don’t seem to work
Home and Garden

5 kitchen cleaning hacks that don’t seem to work

The internet has many videos on the best hacks for cleaning the kitchen quickly and easily. However, not all of them are useful. In fact, some have the opposite effect, and you may have to clean your kitchen all over again after trying them. From using bleach on counters to lining the fridge drawers with newspaper, here are some of the most popular kitchen cleaning hacks that do not work. Using bleach to clean kitchen counters People often forget how poisonous bleach can be to humans, animals, and the environment. The fumes emitted by it have specific organic compounds that can trigger health issues like COPD, chronic respiratory problems, headaches, allergic reactions, and asthma. So, instead of using bleach on the countertops, investing in a cleaner that contains three percent hydrogen peroxide should do the job. Soaking knives in vinegar to remove rust Contrary to what many online influencers suggest, vinegar is ineffective for removing rust from kitchen knives. An alternative that does work involves scrubbing the knives with sliced potatoes dipped in baking soda and then cleaning them with vegetable oil to prevent the development of rust in the future. Using lemon wedges in the dishwasher Lemon-based solutions will make your dishes smell fresh but are not very effective in removing stains.
7 steps of cleaning a water tank
Home and Garden

7 steps of cleaning a water tank

Approximately 60% of the human body constitutes water, the lifeline of all existence on Earth. Clean drinking water ensures well-being and prevents water-borne diseases like cholera and dysentery. While most households have water storage tanks facilitating a regular supply of drinking water, unclean water tanks can cause acute water contamination and contribute to the onset of unfavorable health conditions. So, here are some ways to clean one’s water tank effectively: Clean the top of the tank The first crucial step to cleaning a water tank is to clean the topmost part, from where one would clean the rest. This process ensures a clean and mess-free workspace while cleaning the tank. Clean the tools The best way to clean the tools for tank cleaning is to soak them in a cleaning solution with one part bleach and four parts hot water. Drain the tank The valve to the distribution line should be shut off and water drained from the tap or outlet valve to the best extent possible. This water may be used for various purposes, such as watering plants or washing windows. For example, one would require 2-5 gallon pails of water to clean and rinse the tank. Wash the water tank Mix one part bleach with four parts water and scrub the insides of the water tank.
3 tips for cleaning carpets at home
Home and Garden

3 tips for cleaning carpets at home

Most households have carpeting as flooring because of its soft and warm look, especially in regions where the temperatures are usually cooler. Many people also prefer carpet over other floor coverings because of its easy and economical maintenance. However, even after regular vacuuming, sometimes it becomes difficult to get rid of stains and dirt. Here are some tips professionals use to care for carpet cleaning needs, which you can apply at home. Blot and don’t scrub Spills are normal in a household, especially one with kids or a household that usually hosts too many parties. One of the immediate remedies anyone tries is to scrub the spill. Professionals recommend that you should not scrub the area as it leads to fabric disintegrating, and also, the stain gets ground into the fabric. Instead, they say blotting is better suited. Use a clean cloth or paper towel to gently blot on the spill. This technique puts only a small amount of pressure on the stain, and this helps in soaking up the liquid. Also, always start blotting from the outer edges and work your way inwards rather than the reverse. Shaving cream A neat trick that is extremely easy to try. If you have stained the carpet, take any shaving cream available in the bathroom and apply it directly on the stain.
Avoid these 5 mistakes while installing security cameras
Home and Garden

Avoid these 5 mistakes while installing security cameras

A home can be immaculately designed and well equipped, but it is incomplete without adequate security measures. Security is imperative to ward off unruly events like robbery, theft, and trespassing. While employing security personnel can help ensure safety, technological interventions ensure 100% accuracy at all times and are operational 24×7, reducing long-term costs and eliminating the chances of safety breaches. The key to effectively utilizing security cameras is to avoid certain common installation mistakes: Installing in an area with insufficient or extremely bright lighting Too much or too little light in the area where the camera is installed can lead to unclear or distorted images, which can impede the identification of suspects or comprehension of events. Hence, CCTV cameras should be placed in areas with adequate lighting, neither too bright nor too dim. Installing in an area with a restricted view Placing one’s security camera in an area with several objects blocking the view can cause difficulties with surveillance. Areas with dense greenery, tall buildings, and high walls are not ideal for installing security cameras. Overlooking the height Installing one’s CCTV camera at a high altitude prevents it from getting a panoramic view. In contrast, placing it too low increases the risk of the camera being stolen or tampered with.
5 mistakes that worsen an indoor flea infestation
Home and Garden

5 mistakes that worsen an indoor flea infestation

Fleas are a nuisance and are hard to eliminate once they infest a place. But the problem is ten times harder to deal with indoors as there are many locations for infestations. Poor hygiene and lifestyle habits allow these pesky invaders to keep spreading, and in severe cases, you may have to call professionals to help deal with the issue. To avoid this hassle, here are the following mistakes to prevent an indoor flea infestation. Letting pets indoors without thoroughly cleaning them Fleas usually infest under your pet’s collar and fur, where adult fleas also burrow deep into the skin and lay the larvae that hatch after a while. Pets with a lot of fur tend to shake down dust and debris once they are back indoors from the park, yard, etc. This causes the fleas and larvae to dissipate indoors on the carpeting and furnishings. Constantly letting your pets indoors without having them cleaned thoroughly will bring in a flea infestation from the outside undetected. Following poor sanitary habits Poor hygiene habits like not sweeping the floor, vacuuming carpets, or changing furnishings used in the bedroom and living spaces can trigger a rapid flea infestation indoors. Fleas love dirty, dingy, and damp places where mold and other bacteria fester.
6 window and door cleaning mistakes to avoid
Home and Garden

6 window and door cleaning mistakes to avoid

Deep cleaning the house every couple of weeks is a routine that helps keep the environment safe and hygienic for all the residents. The process involves cleaning the floor thoroughly, washing windows, and cleaning doors. While it may seem like an easy job to simply splash some soap water on everything and wipe it down with a cloth, some mistakes must be avoided when cleaning windows and doors. Here’s what to know about the job. Using harsh detergents Detergents that have strong chemicals in them should be avoided for use on doors as they may harm the door material. There is a protective sealant applied on the doors to minimize deterioration over time, but using these harsh chemicals and striping this protective layer will lead to issues like discoloration and fading of the material. Thus, one must use a soft cloth and warm water to simply remove the buildup and the dust. Using a dirty cloth It is extremely important to be careful of which cloth is being used to clean the surface of the door. Using an old dusty cloth because it may being used for dusting will not suffice. This can leave traces of dirt and even leave scratch marks on the door.