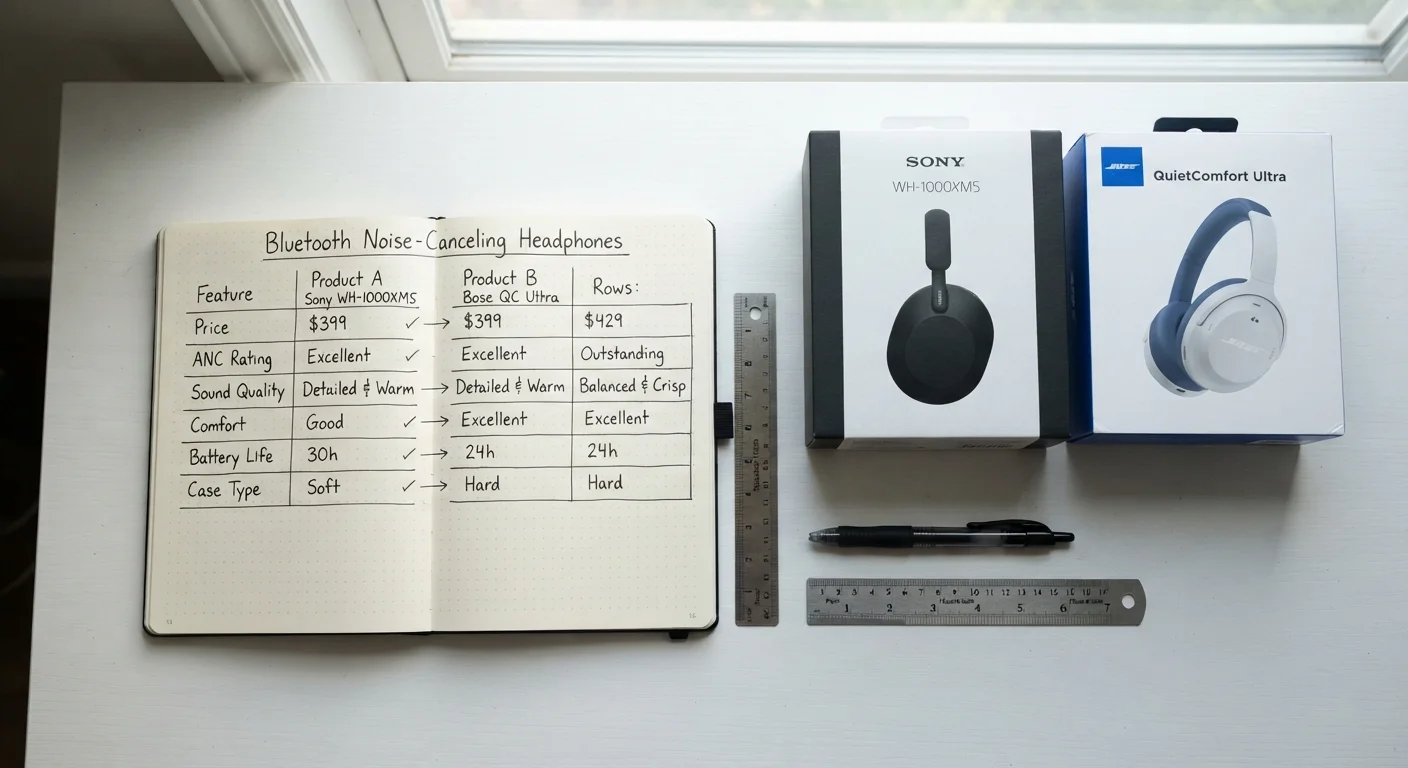

Why Comparison Shopping Gets Chaotic
Most shoppers start with good intentions: open a few tabs, look at prices, pick the lower one. The problem is that product names vary across retailers, specs are formatted differently, and listings frequently omit key details. Within a few minutes you have a dozen tabs open and no reliable way to remember which price was on which site for which version of the product.
The chaos isn't a personal failing - it's a predictable result of comparing without a system. Inconsistent criteria, missing cost data, and tab overload consistently lead to decisions made on incomplete information. That's how shoppers end up anchoring on whichever number they happened to see last. For a closer look at what goes wrong in unstructured comparisons, see the habits that make product comparisons less useful.
A lightweight system - not a complicated one - is all it takes to fix this. The steps below give you that system.
Price Alone Is Not a Complete Picture
A lower sticker price can flip into the worse deal once shipping fees, handling charges, restocking fees, and sales tax are added. Always calculate the true landed cost before drawing any conclusions from a price comparison. Skipping this step is one of the most common ways shoppers end up paying more than they expected.
What You'll Need
You don't need special software to comparison shop effectively. The tools below cover every skill level, from a phone notes app to a simple spreadsheet.
Spreadsheet (Google Sheets or Excel)
Organizes product data in rows and columns so you can compare specs and costs side by side.
Notepad or printed grid
Offline alternative for recording product details and prices during research.
Browser with tab groups or profiles
Keeps shopping tabs separated by retailer or product category to reduce confusion.
What you will need
Once you have these in place, the steps below walk you through the full process from first search to final decision. This approach fits naturally into the broader decision framework covered in everything that goes into a smart everyday purchase decision.
Step-by-Step: Building Your Comparison
Follow these steps in order the first time. Once the habit is set, the process becomes much faster - most of the structure is reusable across future purchases.
Write Down Your Requirements Before Searching
Open a blank document or grab a notepad and list the non-negotiable specs for what you're buying - size, capacity, compatibility, or whatever applies. Also note one or two features you'd like but could live without. This short list becomes your filter. Without it, you'll find yourself evaluating products against each other rather than against your actual needs, which is how comparison fatigue sets in fast.
Set Up a Simple Comparison Grid
Create a table - in a spreadsheet, a notes app, or on paper - with products across the top and your criteria down the side. Include rows for: sticker price, shipping cost, estimated tax, return window, and warranty. Leave a row for notes. This structure forces every option through the same filter and makes gaps in information obvious. A fair comparison relies on consistent criteria; see how to build a fair comparison between two products you've never owned for a deeper framework.
Record the Total Cost, Not Just the Sticker Price
For each product on each site, calculate what you'd actually pay at checkout: sticker price plus shipping plus applicable tax, minus any automatic discounts. Write this number in your grid alongside the sticker price. If return shipping is your cost when something goes wrong, note that too. This is the figure that makes comparisons honest.
Check Return and Warranty Terms on Each Site
A product that costs slightly more but comes with a generous return window and a manufacturer warranty can be a lower-risk choice than a cheaper listing with no returns. Note the return window length, whether return shipping is free, and whether the warranty is fulfilled by the retailer or by a third party. Third-party warranty fulfillment is slower and sometimes more restrictive - that distinction matters when you're comparing otherwise similar options.
Date-Stamp Your Price Records
Online prices change frequently - sometimes within hours. When you record a price in your grid, add the date and time next to it. If you come back to your comparison a few days later, you'll know which figures may be stale and need re-checking. This small habit prevents you from making a decision based on a price that no longer exists.
Cross-Check Reviews Critically Before Finalizing
Once your grid is narrowed to one or two options, look at reviews - but read them the same way on every site. Focus on reviews that describe specific use cases similar to yours, and be skeptical of clusters of vague five-star reviews posted in a short window. For a structured approach to this, see reading customer reviews critically. Then run through a final pre-purchase check with the pre-purchase checklist before you add anything to your cart.
Keep Your Comparison Sheet Simple
Resist the urge to track every spec - focus only on the criteria you defined before you started. A shorter, sharper comparison grid is faster to fill in and easier to read when you're ready to decide. If a spec doesn't affect how you'll actually use the product, leave it out.
Watch for Listing Inconsistencies Across Sites
The same model number can appear with different spec details, bundle contents, or warranty terms depending on the retailer. Never assume two listings are identical just because they share a product name. Cross-check the model number, included accessories, and seller warranty terms directly before recording any data. For a deeper look at this problem, see aligning product information across retailer sites.
When your comparison is complete and a clear option emerges, consider whether any cashback or points programs apply before checkout - cashback programs vs. loyalty points explains how each model works and which suits different spending habits.